Wednesday, July 27, 2016

Western Blot

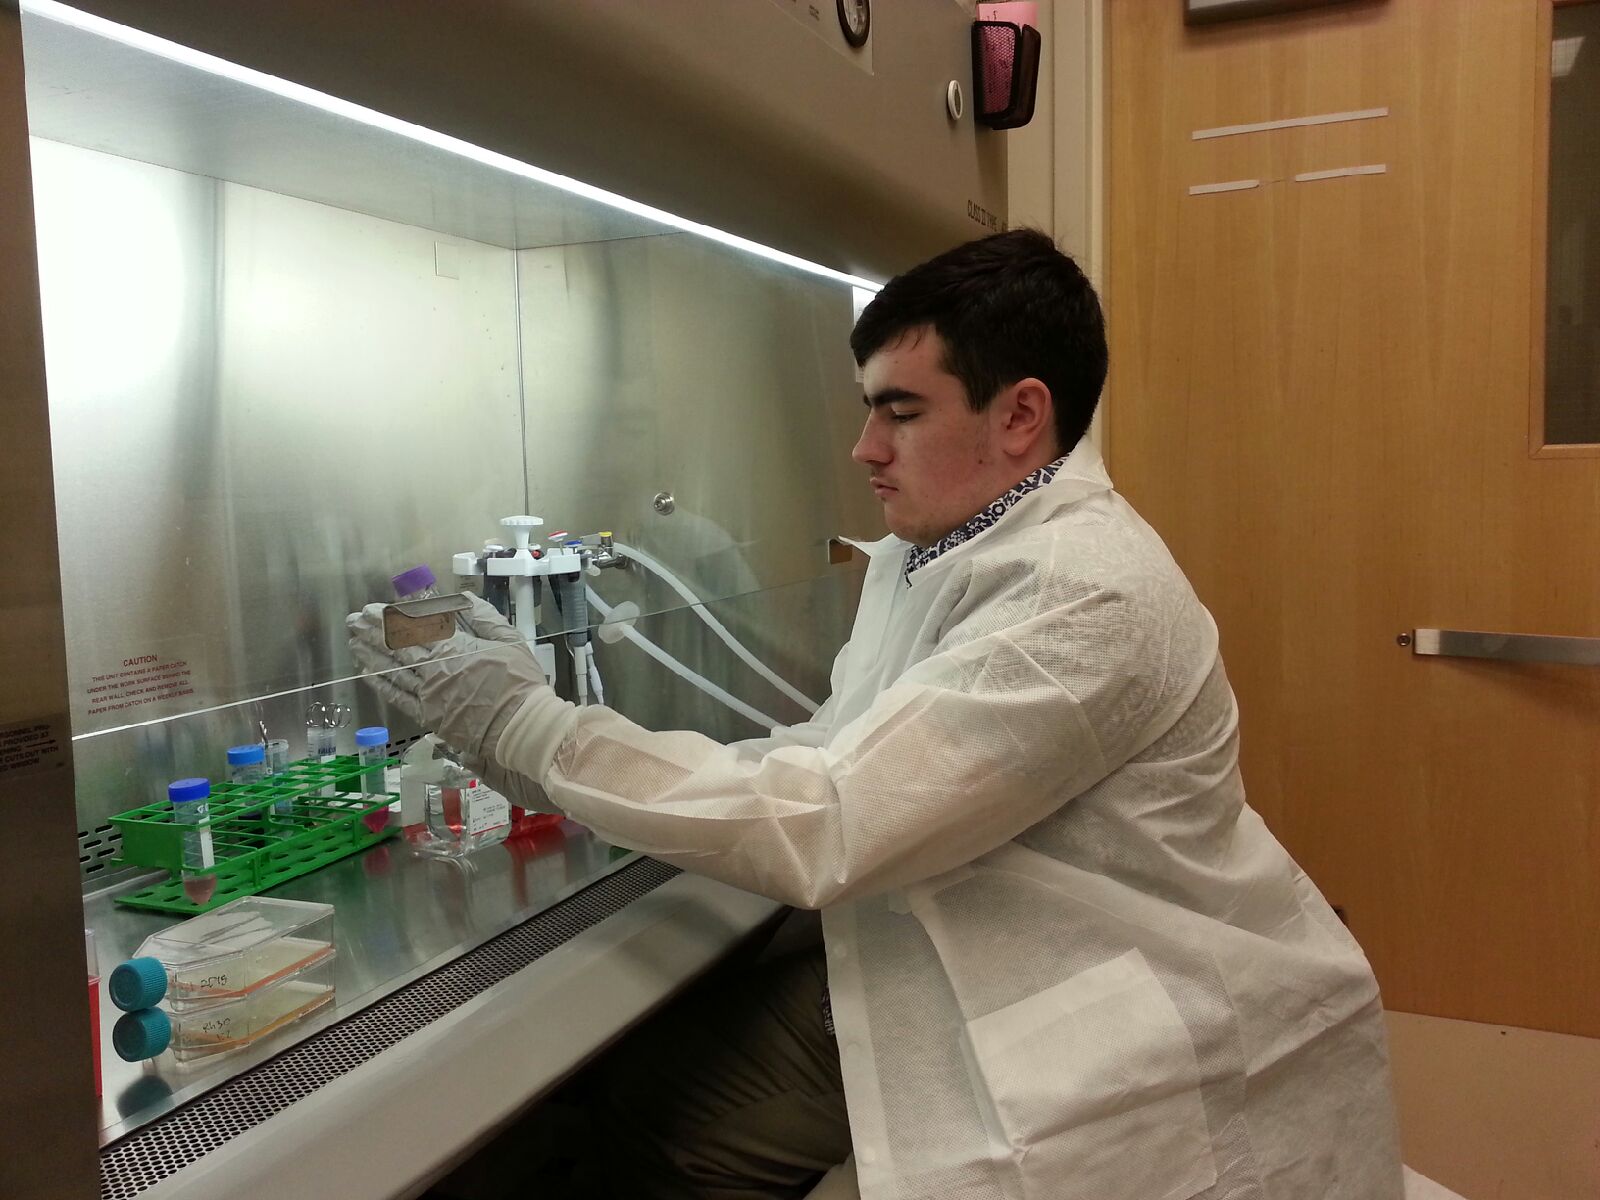
Today went really great, I was able to conduct a western blot using gelatin and an electrical supply. Western blots tell you the different levels of proteins in different parts of the cells nucleus.

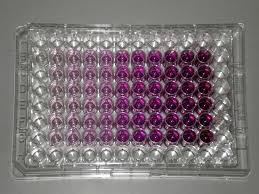
I entered the lab and I was going to do a gel run. Essentially, you have these slides and you put nitrocellulose that has been washed with rabbit and goat protein onto the slide. Nitrocellulose is a material that is actually made from pure cellulose. Pure cellulose is what makes up cotton. It can be put into a paper-like form by a process in which the nitrocellulose is dissolved in a solvent. Nitrocellulose was what used to be used to make movie film and various plastics. Although it was of great use, it was soon found that it was far too flammable for practical use. I have made it many times, and on ignition it always flashes and makes a satisfying “whoompf” noise that never ceases to bring a smile to my face. The proteins are washed onto the slide and what is interesting is that these proteins actually help the cell samples to cling to the nitrocellulose and stain it. Think of it sort of like a chain link. You have rabbit protein which clings to goat proteins, and then the goat proteins cling to the cancer cell proteins that are in the nucleus. There is this slide, and it has these little wells, you fill the wells with your cancer cell samples. The slide is filled with electro-conductive gelatin. The protein samples stain and make these bands at the different points depending on the weight of the protein. You also have what is called a molecular weight. The molecular weight is essentially a control. The molecular weight always falls onto one band. This way depending on the density of the band, you can tell how much of a certain protein was active and formulated inside the cell, this shows in better detail how the cell reacted to the drug and antibody. I will post some pictures in the next week’s post of the western blot results as it is hard to explain in just words.

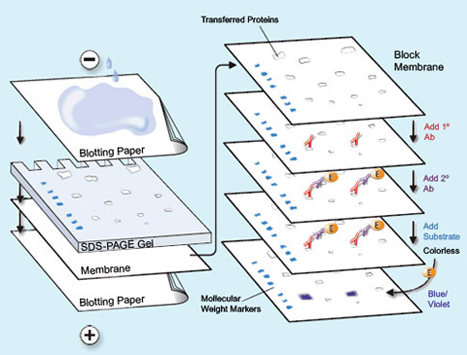
Again, comments are very welcome and I hope you enjoyed.
Thank you for your time,

Aaron J.

Friday, July 8, 2016

Data Crunching


This week, follow me as I plot my data! I know that doesn’t sound very exciting, but I promise it might be exciting.

Unknown-1.jpeg I went to the lab this morning but there was a note on the door. “Aaron we are in a meeting so please make yourself at home in the meantime ~Choh”. So I did just that, I went in and made myself at home, I setup my laptop where I normally sit and waited. A few minutes later Dr. Helman as well as all the other researchers came down from the hallway. They explained that each week, the new “lab meeting day” will be on Thursday at 10:15 a.m. So I made a note of that and went on and started plotting my data. Plotting data is really easy once you get the hang of it. I made a table on Microsoft Excel and was able to calculate the average as well as the standard deviation of the data sets. I did another protein assay and left it in the incubator. Then I went to eat. It was interesting having to deal with the new version of excel. Mr. Choh was really frustrated with some of the newer design changes to the program. 

Unknown.jpeg


After that it was about time to wrap things up. It was a pretty simple day, I didn’t do a whole lot, but that’s okay. On the way back, I actually managed to ride the metro back to Bethesda station all on my own. I don’t like to toot my own horn but that was quite an accomplishment for myself.


Thanks for reading! Comments are welcome and I’ll be sure to respond.
Aaron J.

Drug and Antibody Combination

Drug and Antibody Combination


Hello Harbour Friends! This week was very exciting, I looked at the results from the previous weeks plates where I administered drug and antibody therapy to the cells.


First off I have 2 new cell lines. I will test these cells and share the results next week. On my plate, all the wells grew fine, except for a single well, it was contaminated with nasty fungus. We checked each well under a microscope and what was surprising, was that the fungus killed most of the cancer cells! Of course, this would not make effective therapy, as it will also kill just as many normal cells, but it was still an interesting result. I ate lunch and came back to organize my notes. I had a bunch of sticky notes stuck to a page, but Mr. Choh says that if I went into a laboratory as a student with these notes that the professor would not even let me in the lab. So I spent a good hour putting all these sticky notes down on my lab book in pen and pencil.  I’ll post images of my newly organized notebook soon.

Unknown-2

After this, I did an MMT assay, it is hard to explain, but it is basically a chemical that reacts in each well, based on how many cells have metabolic activity. I’ll post a picture to give you guys a better idea of what it looks like. MMT assay basically has a chemical that gets reduced within the cell via hydrogen bond. The beginning chemical is called 3-{4,5-demethylthiazol-2-yl}-2,5-diphenyltetrazolium bromide which is also known as MTT. I don’t expect anyone to be able to pronounce this because even with my knowledge of chemistry, I can barely manage to stumble through pronouncing these words myself. The mitochondrial reductase changes this to {E,Z}-5-{4,5-dimethylthiazol-2-yl}-1,3-diphenylformazan which is also known as Formazan. I just call it Formazan. 
Unknown

The Bromide ion breaks off and the nitrogen bonds change as the bond at the 4 position breaks its bond with the nitrogen at the 6 position, the nitrogen at 6 binds to a hydrogen. This hydrogen changes the markers chemical composition which changes its color, this acts as the indicator as seen above. 

Thanks for reading, again, comments are welcome and I’ll be sure to respond. 
Thank you, Aaron J.

Monday, May 16, 2016

Let's Get Cooking


            Hello Harbour Friends, today was VERY exciting. We are going to again delve into the world of biology and cancer research from my times at NIH!

            Today was very exciting. I was able to check on my cells from last week, which to my surprise, were clean! They grew perfectly with no sight of bacteria, fungi, or other contaminants. I guess you could say I’m getting the hang of this. I was able to take last week’s cells and further multiply them by transferring cells into more growth media with little to no help from Mr. Choh. From now on I will refer to “Dr. Choh as “Mr. Choh”. I walked in today and asked for Dr. Choh, he shook my hand and humbly said, “I am not a Dr.” 

The steps are as follows:

Aspirate solution (suction it off)
Add phosphate buffer solution (also known as PBS)
Close flask and rock solution around to balance the pH
Aspirate the PBS solution
Add 1 ml of trypsin and rock back and forth, let it sit for a minute then smack the side of the flask
Add 10 ml of growth media
Take five ml of solution and transfer
Add fifteen ml of growth media to original flask

I did this about 4 or so times for the RD and RH-30 cancer cell lineage. I added the 5 ml samples to test tubes that I will use later. After this, I went to lunch. They have quite a nice cafeteria area, with a coffee shop as well as a gift shop. The gift shop has nothing really of interest though. I should get a gift for my friend just to mess with him; he doesn’t always like gifts, especially if they are weird or useless ☺

After this it was back to the lab. I had to first count how many cells I had grown. They use these slides that have 2 little wells, one for inserting the cell culture, and another for the air to escape, after this is done the slide locks both wells. I was then brought to a very big machine, about the size of a desktop computer tower. This machine had a slot that you inserted the slide into. The machine was called cellometer. The machine was connected to a Macintosh computer via USB. You open a program called Cellometer and you hit display image. The microscope inside the machine takes a small square picture of your cells. You then enter the cell type and hit count cells. The machine counts the cells and does the calculations for how many cells you have per ml of fluid. We analyzed the data and plated the cells. In plating the cells you have to make SURE that you have only 20,000 cells per well. The plate is made up of 96 wells that you can divide and label into different sections. I had to grab only a few µl’s (microliters) of the cells. We divided the plate into two halves, each half being a different lineage of cells. Then we had 2 sections of 4 rows on each half. Rows 1- 4 were used to give a control, low dosage of cancer drug treatment, moderate dose, then the highest dose. Rows 5-8 were used for control, low dose of antibody, moderate dose, and then high. We will see how quickly these cells grow in next week’s post.

Overall, I had a wonderful time! Again, I look forward to any feedback on this week’s blog! I look forward to talking about next week’s adventures. Thanks for reading, Aaron J.

Tuesday, April 19, 2016

Hello Harbour Friends!


Hello Harbour Friends! This is Aaron and welcome to the first post of my blog. I am starting my mentorship at the National Institute of Health (NIH) and will be sure to keep all of you posted!
I took the metro last Thursday from Bethesda into the Medical Center metro station. From here I traveled up the escalator to the visitor center and got a visitor I.D. card. Dr. Cheo (my mentor) says he will get me a permanent card so I do not have to keep going through security. This will make things much more convenient.  I was able to enter the lab. The laboratory was very wonderful; scales, chemicals, and various microscopes abound. Dr. Cheo showed me to the “dark and cold room” where they keep all of the growth mediums. The growth mediums are used to grow cells. I suppose it is cold so as to deliberately dampen the rate of growth of bacterium (if there is any). We then entered the fume-hood room. Here there were about 4 or so fume-hoods all equipped with pipette “guns” and various other equipment. Pipette guns are used to control suction. Dr. Cheo sprayed the hood we were using with 70% ethanol to disinfect the hood. We had trouble finding gloves that would fit me, but ultimately he found a box of large nitrile gloves.
Dr. Cheo then exhibited the techniques used in sterility and was able to demonstrate what to do. He then asked “Do you want to get your feet wet?” to which I replied “Of course”. From there I was able to ascertain a good understanding of sterile technique through Dr. Cheo’s demonstration and make a growth medium of penicillium and streptomycin. 
Here are a few rules for sterile technique. 
1) Do NOT reach over things; particulates from your sleeves can fall into the various flasks you may have opened. 
2) ALWAYS grab things from the side, for example; when opening caps or tops of flasks, grab it from the side of the cap, not using your palms to reach over the cap and open it. 
3) Never ever, EVER, grab pipettes with your gloves as they may have contaminants that will touch the pipette and spread into the material you may be suctioning off with said pipette. 
These things will inhibit bacterial growth. Using these pipettes, I was able to transfer cellular culture onto this growth medium and put it into the incubator. Time will tell if my technique was truly sterile or not. It should take a week or so for the results. Everyone at the lab was very nice and polite even though I am just a high school student and not an undergrad.
Thanks for joining me in my adventure by reading this. Please comment and leave suggestions if you have one. Criticism is welcome but must be constructive. All in all it was an amazing experience and I look forward to writing about what happens this Thursday.